1.9. Study Panel
The study panel is shown in Fig. 1.19 (highlighted in red).
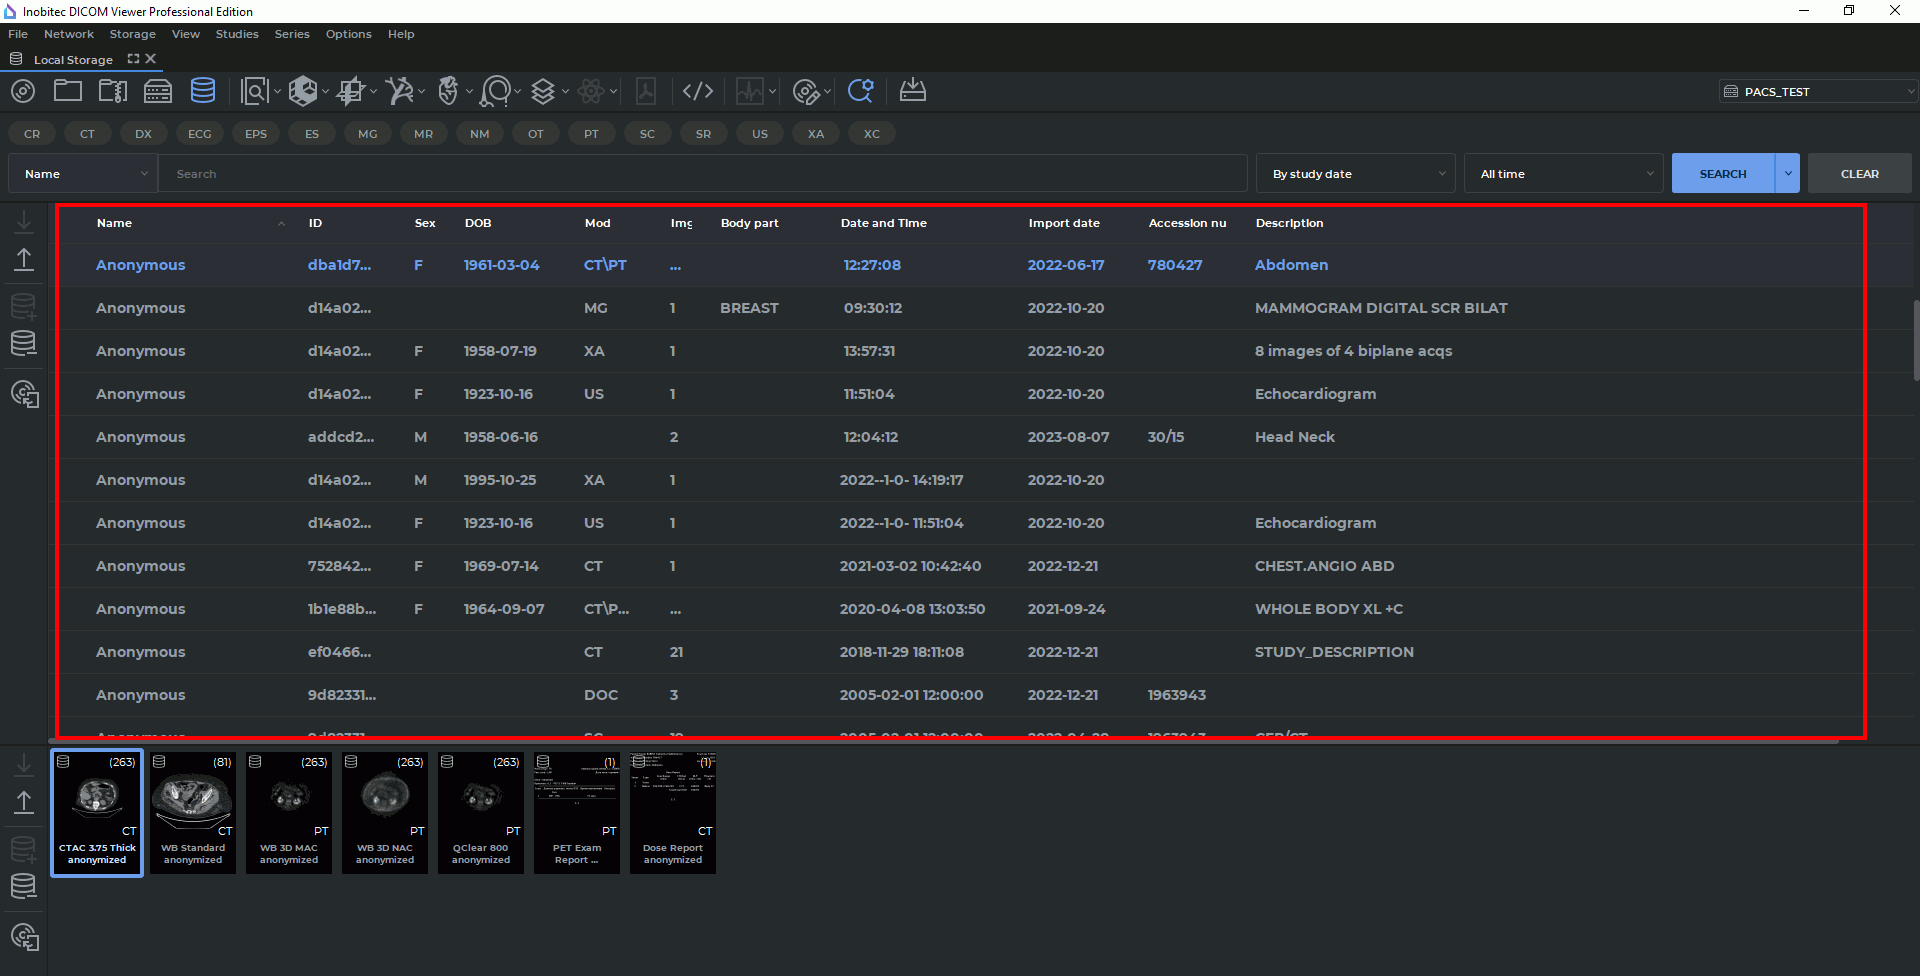
The study panel displays the list of studies stored in the selected location (folder, disk, local storage or PACS server).
To select multiple studies that are contiguous (next to each other):
-
click on one study and then holding Shift click the last study or
-
move the cursor from one study to the last study holding the left mouse button.
To select multiple studies that are anywhere on the study list, click on each one holding the Ctrl key (or the Command key for macOS).
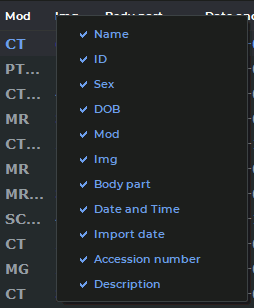
1.9.1 Customize Study Panel
The DICOM Viewer allows you to customize columns and the font for the list of studies.
To select columns, right-click on the table header, a menu with a list of columns will be displayed (Fig. 1.20). The displayed columns are marked with a flag. To check/uncheck a column, left-click on its name on the context menu.
Set size, family and font style to bold and/or italic (see Section 16.7.2).
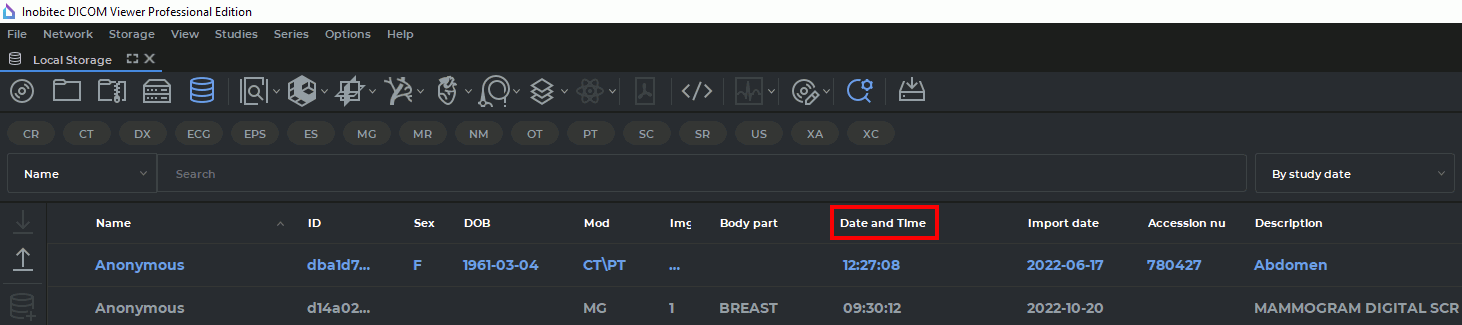
1.9.2 Sort Studies
If two or more studies are displayed, they can be sorted by a certain parameter. To do this, click on the header of the column the parameter is located in. For instance, to sort by date and time, click on the area highlighted in red in Fig. 1.21.
Next to the column name, there is an arrow showing the sorting order (down arrow — descending
 , up arrow — ascending
  ). To change the sorting order, click on the column header
again. Studies can be sorted only by one parameter at a time. The default sorting order is
ascending.
). To change the sorting order, click on the column header
again. Studies can be sorted only by one parameter at a time. The default sorting order is
ascending.
1.9.3 Edit Patient Name and Description in a Study
Editing the displayed patient name the description for this study are possible only for the studies in the Local Storage or for those that are opened from a folder or from a CD. The data itself will remain unchanged, and this information will not be saved on the PACS server. By default, editing is disabled. To enable it, check the box Allow to edit patient name and discription (Section 16.7.2).
 | If you change the patient’s name, another patient’s study may be mistakenly used for establishing a diagnosis. |
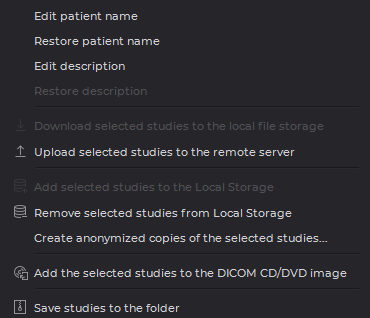
To edit the patient name or study description:
-
Right-click on the study on the study panel. The context menu shown in Fig. 1.22 will pop up.
-
Select one of the menu items Edit Patient Name and Edit Description. The corresponding field will become available for editing, and the cursor will be located in it.
-
Edit the text.
-
Press Enter key on the keyboard or click the mouse in the DICOM Viewer window in any area except the edited text to apply the changes.
These commands are available as well from the Study context menu.
The commands from the context menu (Fig. 1.23) are available during editing. To open the context menu, right-click on the edited text.
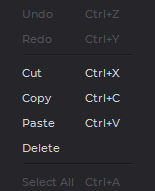
The following commands are available:
-
Undo: undo the changes;
-
Redo: redo the last canceled action;
-
Cut: delete the selected text and copy it to the exchange buffer;
-
Copy: copy the selected text to the exchange buffer;
-
Paste: paste the text from the exchange buffer;
-
Delete: delete the selected text;
-
Select all: select all edited text.
To restore a patient name or description, right-click on the study and select the Restore patient name or Restore description item.
If a command is unavailable, it is displayed in grey in the menu.
The edited patient name and description are displayed in italics after you select it on the Study Panel.
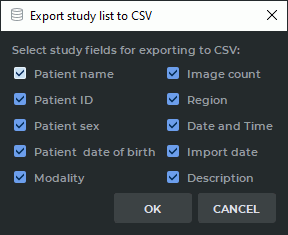
1.9.4 Study List Export
To save the list of studies displayed in the Study Panel to a CSV file:
-
Select the Studies menu and the Export study list to CSV... item.
-
In the dialog (Fig. 1.24) that opens, check columns from which you want to export data and click OK to confirm or CANCEL to cancel.
-
In the dialog that opens choose the folder and file name. Click Save to save data or Cancel to cancel.
A study list file in CSV format is a text file with a table. The columns of the table are separated by commas. The file may be opened in any text editor.
The software intended for working with spreadsheets (Microsoft Excel, LibreOffice Calc etc.) is better suited for viewing and analyzing CSV files data.
To open a CSV file in a spreadsheet application undistorted, proceed as follows (as exemplified by LibreOffice Calc):
-
Run the spreadsheet application.
-
In the dialog box for opening a document, select the CSV file and click Open.
-
In the Text Import dialog box, provide the following parameters:
-
in the Separator options section, select the field separator. In our case, it is a comma;
-
in the Fields section, highlight all the columns in the imported data view window and select the text column type from the dropdown list.
-
-
Click OK to open the document or Cancel to cancel.