8.3. Building Contours
____________________________________________________________________________________________
Functionality is available in a separate module which is activated in the Pro edition for an extra fee
____________________________________________________________________________________________
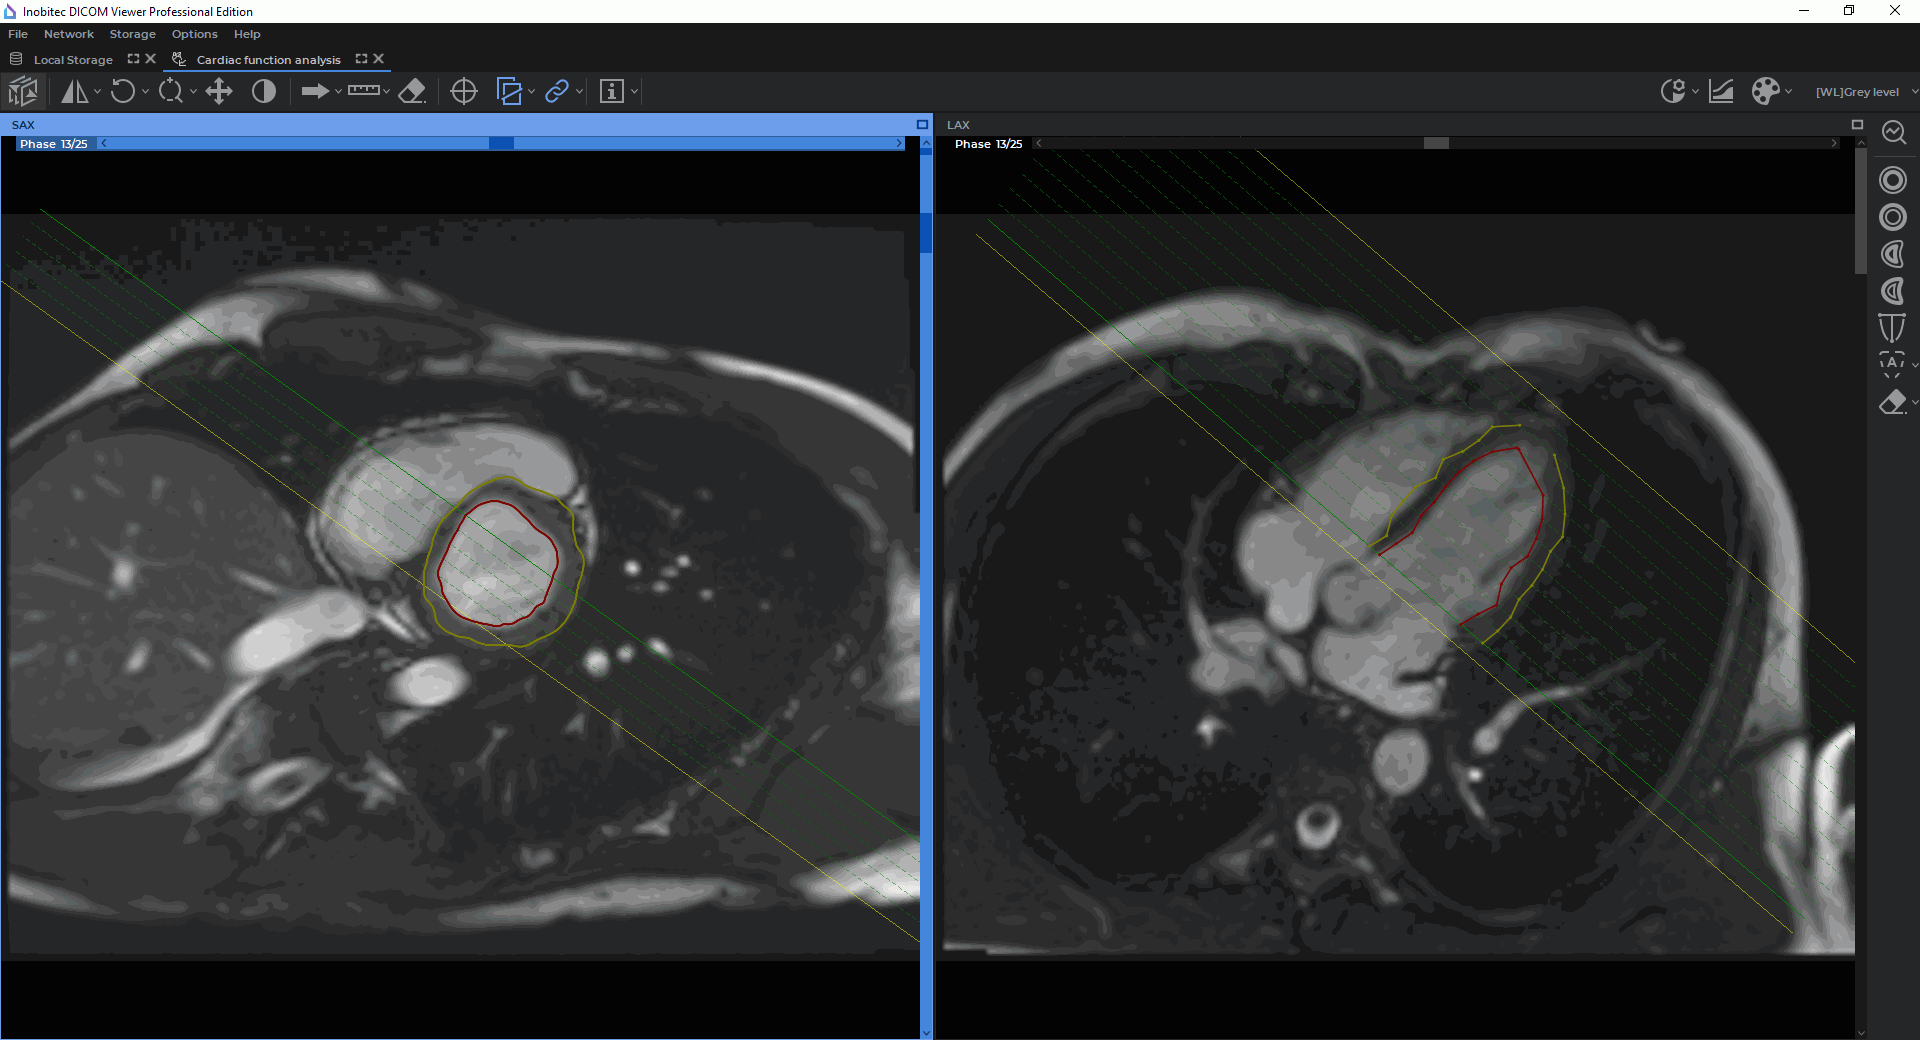
The functional parameters of the left and the right ventricles are calculated on the basis of the contours built. Contours can be built separately for each slice and phase in the window with the SAX merged series. The contour boundaries are shown as points on the slices in the window with the merge LAX series. If two or more contours were built for one phase, the points can be connected by segments. You cannot build contours in the window with a LAX merged series.
To simplify the process of building contours, we recommend enabling the display of slices scout lines in the window selected (see Section 2.26).
8.3.1 Building Contours Manually
____________________________________________________________________________________________
Functionality is available in a separate module which is activated in the Pro edition for an extra fee
____________________________________________________________________________________________
You can use the following tools to build contours manually:
-
Endocardial LV contour
 ;
;
-
Epicardial LV contour
 ;
;
-
Endocardial RV contour
 ;
;
-
Epicardial RV contour
 .
.
The choice of the tool depends on the region of interest and the results of the analysis required.
To build a contour, proceed as follows:
-
Open the study in the Cardiac function analysis tab (see Section 8.1).
-
Activate one of the contour building tools with the left, right, or middle mouse button. To continue work with the same tool, use the button with which the tool was activated. For details on tool management, see Section 1.14. Build the contour in one of the following ways:
-
building contours manually. In the window with the SAX merged series, build a contour around the selected area while holding the button with which the tool was activated. To complete the contour, release the mouse button. To cancel the contour that has not been closed, click Esc on the keyboard while holding the mouse button;
-
building contours with an isoline. Move the cursor around the selected area while holding the Shift button on the keyboard and the mouse button with which the tool was activated. Under the cursor, you will see an isoline. You can see an isoline only on the slices where a contour can be built. To build a contour with an isoline, release the mouse button with which the tool was activated.
-
-
Go to the next slice and contour the selected area.
-
After you have built the required contours, click the Start analysis
 button to go to the
results of parameters assessment (see Section 8.4).

If there is a contour built with the current tool on the current slice, you cannot build a new contour here. You can only edit or delete the existing contour (see Section 8.3.4).
8.3.2 Evaluating the Left Ventricle Extension
____________________________________________________________________________________________
Functionality is available in a separate module which is activated in the Pro edition for an extra fee
____________________________________________________________________________________________
To evaluate the left ventricle extension, you need the SAX and the LAX merged series to be loaded to the Cardiac analysis tab (see Section 8.1).
To evaluate the left ventricle extension, proceed as follows:
-
Open the study in the Cardiac function analysis tab (see Section 8.1).
-
Activate the LV extension boundaries
 tool with the left, right, or middle mouse
button. To continue work with the same tool, use the button with which the tool was
activated. For details on tool management, see Section 1.14.
-
In the window with the SAX merged series, choose the slice for the upper plane of the mitral valve and mark a point in the center of the mitral valve.
-
Go to the slice corresponding to the left ventricular apex and mark a point in the center of the apex.
When you mouse over a point in the window with the SAX merged series, you see a pop-up tip with the type of the point, Mitral or Apex.
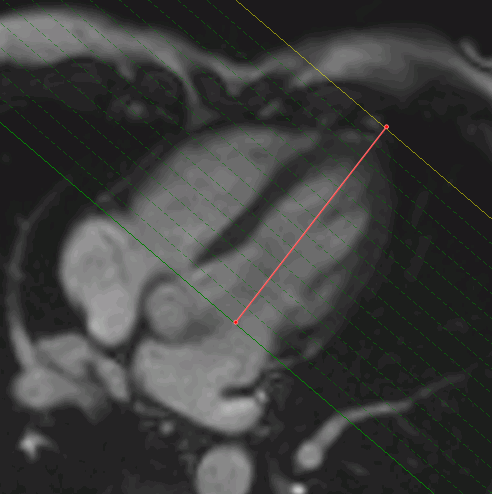
In the window with the LAX merged series, the left ventricle extension is marked with a line (Fig. 8.5).
In multiphase series, the left ventricle extension may be determined for each phase.
8.3.3 Contouring the Left Ventricle Endocardium and Epicardium Automatically
____________________________________________________________________________________________
Functionality is available in a separate module which is activated in the Pro edition for an extra fee
____________________________________________________________________________________________
In the Cardiac function analysis tab, there are two options for automatic contouring:
-
contouring is performed in the SAX window on the slices for the selected phases;
-
contouring is performed in the SAX window on the slices for all the phases.
For automatic contouring of the left ventricle endocardium and epicardium to be performed on the slices for the selected phases, proceed as follows:
-
Open the study in the Cardiac function analysis tab (see Section 8.1).
-
Determine the left ventricle extension (see Section 8.3.2) for the phases where the contouring is to be performed.
-
Click the Auto contouring
 button on the toolbar for cardiac function analysis.
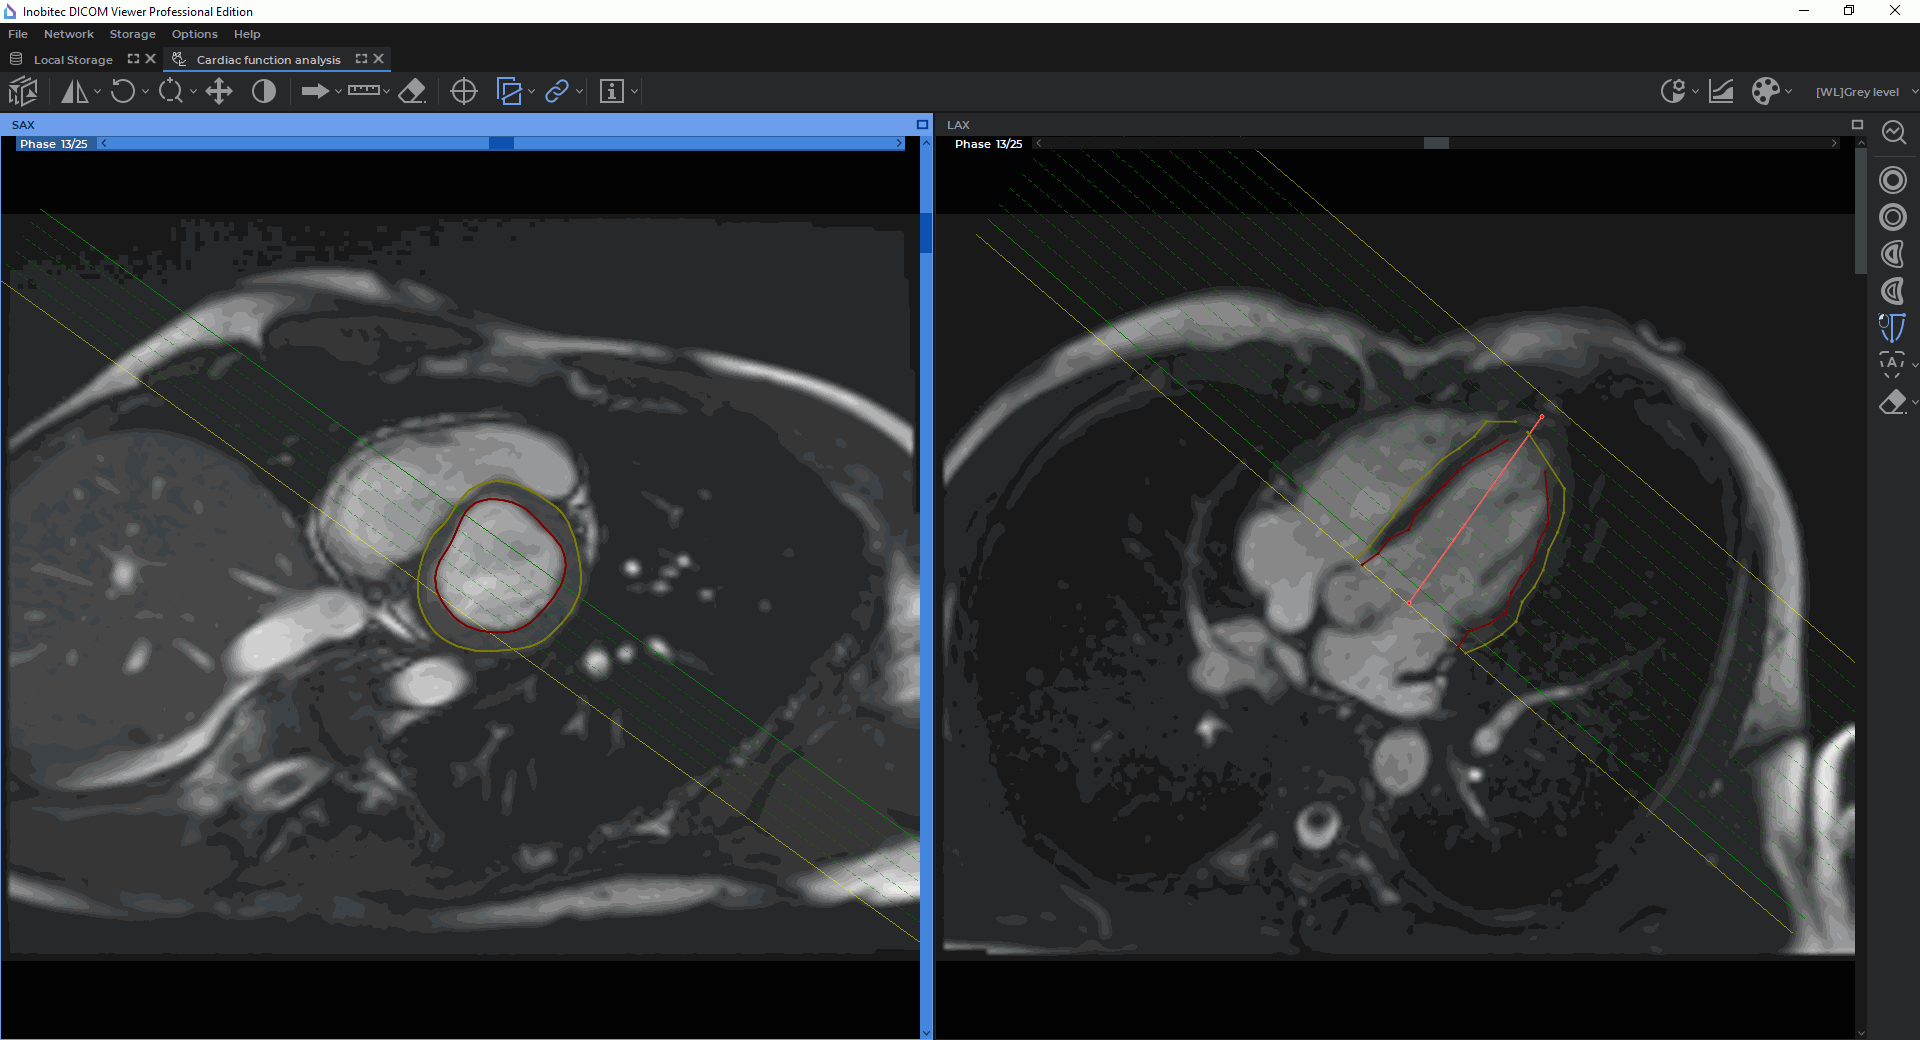
Automatic contouring of the left ventricle endocardium and epicardium are performed in the window with the SAX merged series for all the phases with the left ventricle extension and all the slices within the extension. The contour boundaries are shown on the slices in the window with the LAX merged series (Fig. 8.6).
For automatic contouring of the left ventricle endocardium and epicardium to be performed on the slices for all the phases, proceed as follows:
-
Open the study in the Cardiac function analysis tab (see Section 8.1).
-
Determine the left ventricle extension (see Section 8.3.2) for the End Diastole (ED) and End Systole (ES) phases.

If the number of phases for which the left ventricle extension has been determined does not equal two, automatic contouring for all the phases is unavailable. A respective warning will pop up on the screen. -
Click the arrow on the right-hand side of the Auto contouring
 button and select
Build all contours based on two phases. The contouring process may take some
time.
 | If you select automatic contouring for all the phases, all the left ventricle contours that were built previously will be deleted. |
Automatic contouring of the left ventricle endocardium and epicardium is performed in the window with the SAX merged series for all the phases. The contour boundaries are shown on the slices in the window with the LAX merged series (Fig. 8.6).
 | Attention! If a part of the atrium is present on the mitral valve slice, it may be captures while contouring. |
To rebuild all the contours, press the arrow on the right-hand side of the Auto contouring  button and select Rebuild contours.
 | During automatic contouring, it is possible that tissues may be captured by the contour in error. Check that the contours are drawn correctly and edit the contours manually if necessary. |
To go to the results of parameters assessment, click the Start analysis  button (see
Section 8.4).
8.3.4 Actions with Contours
____________________________________________________________________________________________
Functionality is available in a separate module which is activated in the Pro edition for an extra fee
____________________________________________________________________________________________
The DICOM Viewer provides an opportunity to perform the following actions with contours in the SAX window:
-
editing. Mouse over the selected contour. When the cursor is placed on the contour, the contour is highlighted. Click the mouse button in the place where you want to edit the contour and build a new contour while holding the mouse button. To complete the contour, release the mouse button;
-
deleting a contour. Mouse over the selected contour, click the right mouse button, and select the Remove contour option on the context menu;
-
deleting the extension boundaries. Place the cursor on one of the points used for evaluating the LV extension. The point will be highlighted. Click the right-hand mouse button and select the Remove extension boundaries option on the context menu.
Contours and LV extension boundaries can also be deleted from the contours panel (see Section 8.3.5).
8.3.5 Contours panel
____________________________________________________________________________________________
Functionality is available in a separate module which is activated in the Pro edition for an extra fee
____________________________________________________________________________________________
The contours panel (Fig. 8.7) is expanded/minimized with the "Contours panel"  button
on the cardiac analysis toolbar. By default, the contours panel is expanded.
The contours panel provides for navigation between images and for contour management. The contours panel is presented as a phase and slice contingency table. The column header shows the phase number, and the line header shows the slice number. The cells contain information on contours and LV extension boundaries in the form of conventional signs:
-
endocardial LV contour is
 ;
;
-
epicardial LV contour is
 ;
;
-
endocardial RV contour is
 ;
;
-
epicardial RV contour is
 ;
;
-
LV extension boundaries passage through the slice is
 .
.
To go to the selected slice image and phase in the SAX window, left-click on the respective cell.
The cell corresponding to the image in the SAX window is highlighted.
The DICOM Viewer provides an opportunity to perform the following actions with contours:
-
Deleting contours on the selected slice. Right-click on the selected cell and on the context menu, select:
-
Remove LV endocardial contour (<slice number; phase number>);
-
Remove LV epicardial contour (<slice number; phase number>);
-
Remove RV endocardial contour (<slice number; phase number>);
-
Remove RV epicardial contour (<slice number; phase number>).
-
-
Deleting a certain type of contours on all the images for the selected phase. Right-click on the column header (phase number) and on the context menu, select:
-
Remove LV endocardial contours (<phase number>);
-
Remove LVepicardial contours (<phase number>);
-
Remove RV endocardial contours (<phase number>);
-
Remove RV epicardial contours (<phase number>).
In the dialog box that opens, click YES to confirm the deletion, or click NO to cancel.
-
-
Deleting a certain type of contours on all the images for the selected slice. Right-click on the line header (slice number) and on the context menu, select:
-
Remove LV endocardial contours (<slice number>);
-
Remove LV epicardial contours (<slice number>);
-
Remove RV endocardial contours (<slice number>);
-
Remove RV epicardial contours (<slice number>).
In the dialog box that opens, click YES to confirm the deletion, or click NO to cancel.
-
-
Deleting all the contours of the same type. Click the arrow on the right-hand side of the Remove all cardiac contours
 button. On the menu, select the type of contours you
want to delete from all the slices. In the dialog box that opens, click YES to confirm the
deletion, or click NO to cancel. The selected contour type is removed from all slices and phases
in the SAX window.
-
Deleting all the contours. To delete all the contours, click the Remove all cardiac contours
 button. In the dialog box that opens, click YES to confirm the deletion, or
click NO to cancel. All the contours on all the slices in the window with the SAX merged series
will be deleted.
-
Deleting LV extension boundaries for the selected phase. Right-click on the column header (phase number) and on the context menu, select: Remove lv extension boundaries (<phase number>).
The program automatically detects and highlights the end phases with the maximum and the minimum ventricle cavity volume at the time of relaxation (diastole) and contraction (systole). The final phase of contraction (ES) is highlighted with green, and the final phase of relaxation (ED) — with red.
To lock the end phases, click the Lock end phases  button on the contours panel. After
the end phases are locked, the button will take the shape of
  . In this case, the end phases cannot
be detected automatically after creating, editing, and deleting contours. To enable automatic
detection of the end phases, click the Unlock end phases
  button on the contours panel. The
button will take the shape of
  .
.
The user may manually set and lock the selected end phase as ES or ED. To do that, right-click on the column header (phase number) and on the context menu, select Set <phase number> as ES or Set <phase number> as ED.


