17.2. DICOM Tag Viewer Window
There are four ways to view DICOM tags:
-
Select a series thumbnail on the series panel and click the Show image tags
 button
on the toolbar (see Section 1.4).
button
on the toolbar (see Section 1.4).
-
Right-click on a series thumbnail to call up the context menu and select the Show image tags option.
-
Select the Show image tags option from the View tab of the main menu (see Section 1.1).
-
Open a study series in the Image viewer tab (see Section 2.31), right-click to call up the context menu and select the Show image tags option.
 | ECG modality series (see Chapter 11) and series containing protocols (see Chapter 18) are opened in the respective tabs. PDF documents are opened in third-party software installed in the user’s OS. Series that do not conform to the DICOM standard or series for which there are no special tabs to view are opened in the DICOM tag viewer tab. |
The DICOM Tag Viewer window is shown in Fig. 17.1.
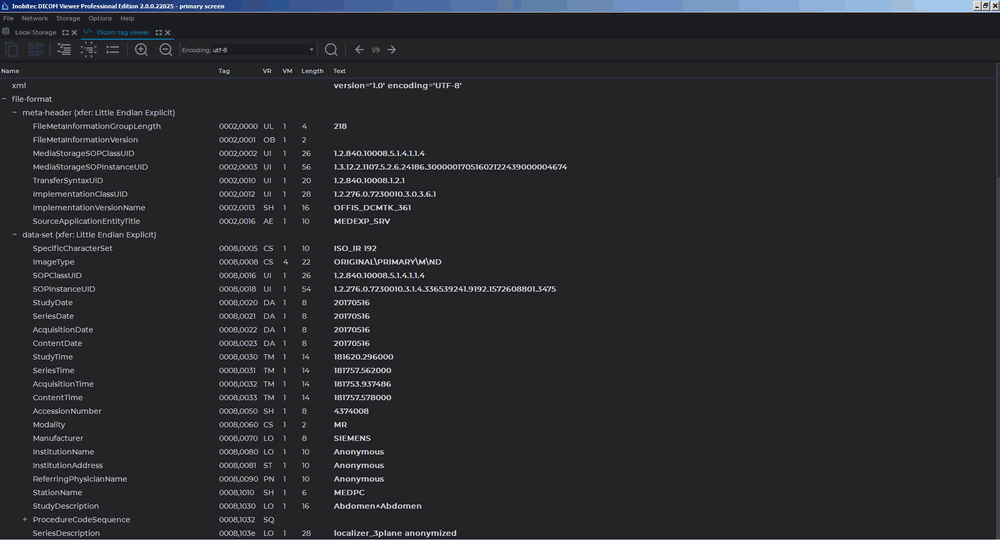
17.2.1 Toolbar
The toolbar is placed in the upper part of the window (Fig. 17.2).

 | The Copy button is used for copying the selected data to the clipboard. |
 | The Detail button is used for showing the contents of the element in a separate window. |
 | The Expand all button shows the tag tree. |
 | The Optimal view button shows only two levels of the tag tree. |
 | The Collapse all button is used to collapse the tag tree. |
 | The Zoom in button is used to enlarge the text size. |
 | The Zoom out button is used to shrink the text size. |
| The Encoding drop-down menu allows for the selection of the character set used for displaying data. By default, the character set provided for in the DICOM file is used. | |
 | The Search button opens/closes the search bar at the bottom of the window. |
 | The Switch to the previous image button shows the DICOM tags for the previous image in the series. |
 | The image indicator shows the current image number and the total number of images in the series. The number is assigned to the image by the modality, and it may be different from the sequence number of the image shown in the Image Viewer window. |
 | The Switch to the next image button shows the DICOM tags for the next image in the series. |
17.2.2 Tag Tree
The tag tree is placed under the toolbar. If several tags belong to the same group, the group is unfolded and the tags are shown. Groups can be nested, one inside another. To unfold a group, click + on its left; to collapse a group, click -. To unfold all the groups, click the Show All button on the toolbar; to collapse all the groups, click Collapse All; to unfold only second level groups, click the Best View button.
Tags cannot be edited. The data from the DICOM tag viewer tab can be copied to the clipboard and then inserted in the report editor (see Chapter 18) or in any text editor. To copy the value from the element field, select it with the left mouse button and click Copy on the toolbar, or else choose Copy on the context menu.
17.2.3 Search
To open the search bar, click the Search button on the toolbar. The search bar will be displayed at the bottom of the window. To close the search bar, click the cross on the right or the Search button.
You can perform search by any data contained in the element. To perform search, enter the text you need to find in the Search field. The elements with fully or partially matching values will be highlighted in green; the first element found will be highlighted in orange. If no matches are found, the text entered will turn red. The number of the element chosen and the total quantity of the elements found is displayed on the right. To go to the next element found, click the Next button; to go to the previous element, click the Previous button. To perform case sensitive search, check the Match Case box. To highlight all the values found, check the Highlight All box (it is checked by default).