ИНОБИТЕК
Contents
  • About this Manual
    • Contents
    • Accepted Conventions
  • Technical Support
  • About the Product
    • Viewer Functionality
    • New Functions in Version 1.15
  • Installing, Uninstalling and Launching the Program
    • System Requirements
    • Installing and Uninstalling the Program
    • Launching the Program
    • Service files
    • Launching the Web Viewer
  • Chapter 1. Program Window Elements
    • 1.1. Main Menu
    • 1.2. Windows Management
    • 1.3. Tab Panel
    • 1.4. Tollbar
    • 1.5. Select Data Source
    • 1.6. Save Studies to the folder
    • 1.7. Search Panel
    • 1.8. Select Server Panel
    • 1.9. Study Panel
    • 1.10. Series Panel
    • 1.11. Studies and Series Import/Export Panels
    • 1.12. Information Panel
    • 1.13. Uncompress series
    • 1.14. Anonymize studies and series
  • Chapter 2. View Flat Images
    • 2.1. Open Series
    • 2.2. Open Series with Current Settings
    • 2.3. Working with Several Monitors and Splited Screen
    • 2.4. Resampling filter
    • 2.5. View Images in a Series
    • 2.6. Switch between Series
    • 2.7. View Several Studies at a Time
    • 2.8. View Multiple Series
    • 2.9. View Multiple Images in the Same Series Simultaneously
    • 2.10. Play images
    • 2.11. Video recording
    • 2.12. Zoom. Pan. Rotate
    • 2.13. Set Window Level and Width
    • 2.14. Magnifier
    • 2.15. Measurements
    • 2.16. Dynamic contrast-enhanced MRI and CT View Mode
    • 2.17. Visualize Images
    • 2.18. SUV Measurement
    • 2.19. Calcium Scoring
    • 2.20. Scout Lines
    • 2.21. Set Up Viewer Workspace
    • 2.22. Export Images
    • 2.23. DSA Mode
    • 2.24. Image Information in the Series Window
    • 2.25. View DICOM Tags
    • 2.26. Graphic Label Tool
    • 2.27. Synchronize Images
    • 2.28. Mirror Image Horizontally/Vertically
    • 2.29. Calibration sizes
    • 2.30. Additional Options
  • Chapter 3. Volume Reconstruction
    • 3.1. View Images
    • 3.2. Actions with the Model
    • 3.3. Model Positioning Tools
    • 3.4. The Play Tool
    • 3.5. Video recording
    • 3.6. Cutting Tools
    • 3.7. Centrate
    • 3.8. Clipping Box
    • 3.9. Measurements
    • 3.10. Markers
    • 3.11. Export Model
    • 3.12. Render settings
    • 3.13. Reconstruction by Series with Varying Distances between Slices
    • 3.14. Remove Bone Tissue
  • Chapter 4. Series Fusion
    • 4.1. Volume Reconstruction of Cardiac Studies
    • 4.2. Merge Series from Different Studies
    • 4.3. Merge layers
    • 4.4. Image registration
    • 4.5. Actions with the fused series
    • 4.6. Image stitching mode
  • Chapter 5. Multiplanar Reconstruction (MPR)
    • 5.1. Open Study in Multiplanar Reconstruction window
    • 5.2. MPR View Elements
    • 5.3. View Images
    • 5.4. Working with Orthogonal Planes
    • 5.5. Curvilinear Reconstruction
    • 5.6. The Play Tool
    • 5.7. Video recording
    • 5.8. Markers
    • 5.9. Reconstruction Modes. Slice Thickness
    • 5.10. Rotate Image in the Section Plane
    • 5.11. Mirror Image Horizontally/Vertically
    • 5.12. Show labels tool
    • 5.13. Export Images
    • 5.14. Reslice
    • 5.15. Measurements
    • 5.16. Annotations
    • 5.17. Volume Reconstruction window
    • 5.18. Diffusion Tensor Imaging (DTI) Mode
  • Chapter 6. Segmentation
    • 6.1. The Segmented Structures Panel
    • 6.2. The Mask
    • 6.3. Creating segmented structure
    • 6.4. Structure editing
    • 6.5. Building surface
    • 6.6. Union, subtraction and intersection of the structures
    • 6.7. Actions with the structure
    • 6.8. Export structure and surface
    • 6.9. Import surface
    • 6.10. Histograms
  • Chapter 7. Planning of Pedicle Screws Installation
    • 7.1. Open Study in Planning of Pedicle Screws Installation window
    • 7.2. Planning of Pedicle Screws Installation window View Elements
    • 7.3. The Play Tool
    • 7.4. Video recording
    • 7.5. Planning of Pedicle Screws Installation
    • 7.6. Export images for print
  • Chapter 8. Vessels analysis module
    • 8.1. Open Studies in Vessels Analysis Module
    • 8.2. The Play Tool
    • 8.3. Video recording
    • 8.4. Centerline building mode
    • 8.5. Vessels Analysis Mode
    • 8.6. Coronary Arteries Analysis
  • Chapter 9. PET analysis
    • 9.1. Open Studies in PET Analysis window
    • 9.2. PET Analysis View Elements
    • 9.3. The Play Tool
    • 9.4. Video recording
    • 9.5. PET Window settings
    • 9.6. Image Positioning
    • 9.7. Visualize Images
    • 9.8. Measurements and Annotations
    • 9.9. Measure the Intensity Average and Standard Deviation in an Space
  • Chapter 10. Virtual Endoscopy
    • 10.1. Open Studies in Virtual Endoscopy window
    • 10.2. View Elements. Customize MPR Panel
    • 10.3. Move Camera
    • 10.4. Video recording
    • 10.5. Customize Image
    • 10.6. Measurements and Markers
    • 10.7. Multiplanar Reconstruction
    • 10.8. Surface Reconstruction
    • 10.9. Export
  • Chapter 11. ECG Viewer
    • 11.1. Select Data Source
    • 11.2. Open Series in ECG View window
    • 11.3. View Graphs
    • 11.4. Toolbar
    • 11.5. Frequency Filters
    • 11.6. Export series
  • Chapter 12. Network
    • 12.1. Services
    • 12.2. Set Up PACS Server Connection
    • 12.3. Network Operation Status
  • Chapter 13. The Local Storage
    • 13.1. View Storage Status
    • 13.2. Verify Storage
    • 13.3. Clear Storage
    • 13.4. Automatic Local Storage cleaning
  • Chapter 14. Disk Creator
    • 14.1. General information
    • 14.2. Add Data to Disk Creator
    • 14.3. Burn image
    • 14.4. View studies written on disk
  • Chapter 15. Viewer Settings
    • 15.1. General
    • 15.2. Monitor
    • 15.3. Skins
    • 15.4. Modules
    • 15.5. Set Up ``Hotkeys'' Module
    • 15.6. Import and Export Settings
  • Chapter 16. Print Images
    • 16.1. Working with Print List
    • 16.2. Edit print list in Preview window
    • 16.3. Print Images on Film
    • 16.4. Print Images on Paper
  • Chapter 17. Licensing
    • 17.1. Trial period
    • 17.2. The First Launch and Licensing
    • 17.3. Purchase of a License
  • Chapter 18. The Help System and User Assistance
    • 18.1. Help System
    • 18.2. Tooltips
  • ``Hotkeys''
    • Accepted Abbreviations
    • Key Combinations Used in All Windows
    • Key Combinations Used in Image View Window
    • Key Combinations Used in 3D Reconstruction Window
    • Key Combinations Used in DICOM Tag View Window
    • Key Combinations Used in Curvilinear Reconstruction Mode
    • Key Combinations Used in Multiplanar Reconstruction Window
    • Key Combinations Used in Virtual Endoscopy Window
 
Inobitec DICOM Viewer

Chapter 15. Viewer Settings

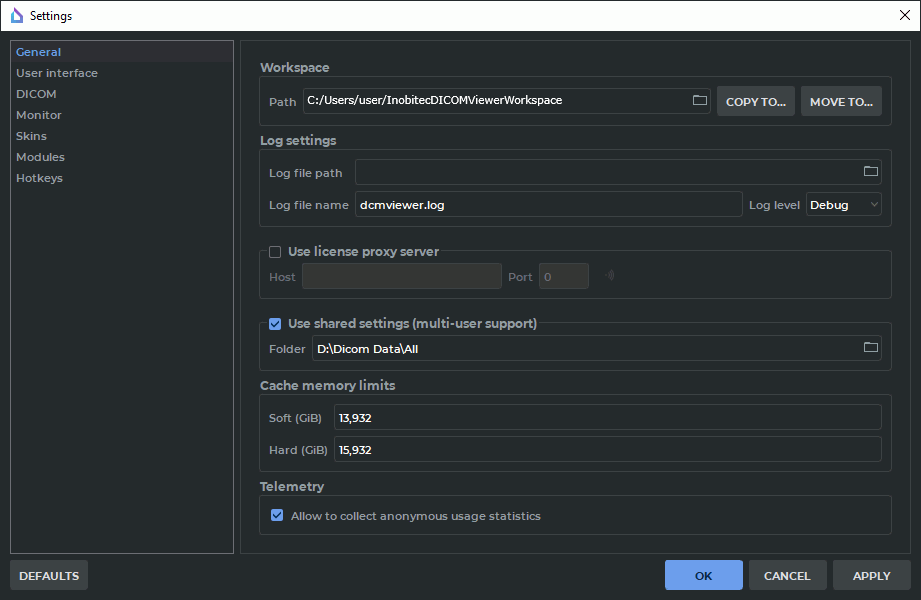
To change the settings, select the Options menu and the Settings item. The window shown in Fig. 15.1 will pop up.


PIC

Figure 15.1: Viewer setup window. General settings


The setup menu will be displayed on the left side of the window.

The Defaults button allows you to set the settings for the current window, which are set upon the very first launch of the Viewer on the computer.

15.1 General
15.2 Monitor
15.2.1 Set Up a Second Monitor
15.2.2 Split Screen
15.3 Skins
15.4 Modules
15.4.1 Set Up Image Viewer Module
15.4.2 Set Up Study List Module
15.4.3 Set Up 3D Reconstruction Module
15.4.4 Set Up Network Support Module
15.4.5 Set Up Local Storage Module
15.4.6 Set Up "DICOM CD/DVD Creator"
15.4.7 Set Up PET Analysis Module
15.5 Set Up “Hotkeys” Module
15.6 Import and Export Settings
15.6.1 Export Settings
15.6.2 Import Settings

  • Main page
  • Products
  • Services
  • Downloads
  • About
© 2019 INOBITEC. LLC. All rights reserved