ИНОБИТЕК
Contents
  • About this Manual
    • Accepted Conventions
    • Warnings
  • Technical Support
  • About the Product
    • DICOM Viewer Functionality
    • New Functions in Version 2.9
  • Installing, Uninstalling and Launching the Program
    • System Requirements
    • Installing and Uninstalling the Program
    • Service files
    • Import CLUTs
    • Getting Started
    • First run of the Program
    • Launching the Web Viewer
  • Chapter 1. Program Window Elements
    • 1.1. Main Menu
    • 1.2. Window Management
    • 1.3. Tab Panel
    • 1.4. Toolbar
    • 1.5. Select Data Source
    • 1.6. Save Studies to the folder
    • 1.7. Search Panel
    • 1.8. Select Server Panel
    • 1.9. Study Panel
    • 1.10. Series Panel
    • 1.11. Studies and Series Import/Export Panels
    • 1.12. Information Panel
    • 1.13. Uncompress series
    • 1.14. Tool Control Buttons
  • Chapter 2. View Flat Images
    • 2.1. Open Series
    • 2.2. Open Series with Current Settings
    • 2.3. Working with Several Monitors and Split Screen
    • 2.4. Resampling filter
    • 2.5. View Images in a Series
    • 2.6. Switch between Series
    • 2.7. View Several Studies at a Time
    • 2.8. View Multiple Series
    • 2.9. View Multiple Images in the Same Series Simultaneously
    • 2.10. Viewing Orthogonal Projections of Images
    • 2.11. Play images
    • 2.12. Video recording
    • 2.13. Zoom. Pan. Rotate
    • 2.14. Set Window Level and Width
    • 2.15. Magnifier
    • 2.16. Measurements
    • 2.17. Perfusion Parameters Estimation
    • 2.18. Evaluation of Blood Flow Parameters
    • 2.19. Visualize Images
    • 2.20. SUV Measurement
    • 2.21. Calcium Scoring
    • 2.22. Scout Lines
    • 2.23. Set Up Viewer Workspace
    • 2.24. Export Images
    • 2.25. DSA Mode
    • 2.26. Image Information in the Series Window
    • 2.27. View DICOM Tags
    • 2.28. Graphic Label Tool
    • 2.29. Synchronize Images
    • 2.30. Synchronization by a Point
    • 2.31. Mirror Image Horizontally/Vertically
    • 2.32. Calibration sizes
    • 2.33. Apparent diffusion coefficient
  • Chapter 3. Volume Reconstruction
    • 3.1. View Images
    • 3.2. Model Projection
    • 3.3. Actions with Model
    • 3.4. Model Positioning Tools
    • 3.5. "Select Model Point" Tool
    • 3.6. The Play Tool
    • 3.7. Video recording
    • 3.8. Cutting Tools
    • 3.9. Centrate
    • 3.10. Clipping Box
    • 3.11. Measurements
    • 3.12. Markers
    • 3.13. Export Model
    • 3.14. Render settings
    • 3.15. Reconstruction by Series with Varying Distances between Slices
    • 3.16. Remove Bone Tissue
  • Chapter 4. Series Fusion
    • 4.1. Create Series Fusion
    • 4.2. Merge Series from Different Studies
    • 4.3. Merge layers
    • 4.4. Image registration
    • 4.5. Actions with the fused series
    • 4.6. Image stitching mode
  • Chapter 5. Multiplanar Reconstruction (MPR)
    • 5.1. Open Study in Multiplanar Reconstruction window
    • 5.2. MPR View Elements
    • 5.3. Resampling filter
    • 5.4. Working with Orthogonal Planes
    • 5.5. Curvilinear Reconstruction
    • 5.6. "Render settings" Tool
    • 5.7. The Play Tool
    • 5.8. Video recording
    • 5.9. Markers
    • 5.10. Reconstruction Modes. Slice Thickness
    • 5.11. Rotate Image in the Section Plane
    • 5.12. Mirror Image Horizontally/Vertically
    • 5.13. Show labels tool
    • 5.14. Export Images
    • 5.15. Reslice
    • 5.16. Measurements
    • 5.17. Annotations
    • 5.18. Volume Reconstruction window
    • 5.19. Diffusion Tensor Imaging (DTI) Mode
  • Chapter 6. Segmentation
    • 6.1. The Segmented Structures Panel
    • 6.2. The Mask
    • 6.3. Creating segmented structure
    • 6.4. Building Segmented Structures with Contours
    • 6.5. Structure editing
    • 6.6. Building surface
    • 6.7. Copying a Surface
    • 6.8. Union, subtraction and intersection of structures
    • 6.9. Actions with structure
    • 6.10. Import and Export
    • 6.11. Saving and Opening Segmentation Projects and DTI Projects
    • 6.12. Histograms
  • Chapter 7. Vessel analysis module
    • 7.1. Open Studies in Vessel Analysis Module
    • 7.2. "Render settings" Tool
    • 7.3. The Play Tool
    • 7.4. Video recording
    • 7.5. Centerline building mode
    • 7.6. Vessel Analysis Mode
    • 7.7. Coronary Artery Analysis
  • Chapter 8. PET analysis
    • 8.1. Open Studies in PET Analysis tab
    • 8.2. PET Analysis Tab Elements
    • 8.3. MIP mode
    • 8.4. The Play Tool
    • 8.5. Video recording
    • 8.6. PET Window settings
    • 8.7. Image Positioning
    • 8.8. Visualize Images
    • 8.9. Measurements and Annotations
    • 8.10. Measure the Intensity Average and Standard Deviation in Space
    • 8.11. Synchronization in the PET analysis tab
  • Chapter 9. Virtual Endoscopy
    • 9.1. Open Studies in Virtual Endoscopy window
    • 9.2. View Elements. Customize MPR Panel
    • 9.3. Move Camera
    • 9.4. Video recording
    • 9.5. Customize Image
    • 9.6. Measurements and Markers
    • 9.7. Multiplanar Reconstruction
    • 9.8. Surface Reconstruction
    • 9.9. Export
  • Chapter 10. ECG Viewer
    • 10.1. Select Data Source
    • 10.2. Open Series in ECG View window
    • 10.3. View Graphs
    • 10.4. Toolbar
    • 10.5. Frequency Filters
    • 10.6. Export series
  • Chapter 11. Lung Damage Assessment with the Help of Artificial Intelligence
    • 11.1. Licensing and the First Launch of the Artificial Intelligence Module
    • 11.2. Requirements for the CT Series Used for COVID-19 Assessment
    • 11.3. Uploading Data to the Artificial Intelligence Server and Viewing the Results
    • 11.4. Artificial Intelligence Module Settings
  • Chapter 12. Image annotation
    • 12.1. Licensing the Image Annotation Module
    • 12.2. Opening a Series in the Image Annotation Mode
    • 12.3. Creating a Tree of Object Groups and Classes
    • 12.4. Export and Import of the Tree of Groups and Classes
    • 12.5. Marking Objects with Contours
    • 12.6. Saving and Opening Annotation Results
    • 12.7. Export of Annotation Results
  • Chapter 13. Network
    • 13.1. Services
    • 13.2. Set Up PACS Server Connection
    • 13.3. Network Operation Status
    • 13.4. HTTP RPC service
  • Chapter 14. The Local Storage
    • 14.1. View Storage Status
    • 14.2. Verify Storage
    • 14.3. Clear Storage
    • 14.4. Automatic Local Storage cleaning
  • Chapter 15. Disk Creator
    • 15.1. General information
    • 15.2. Add Data to Disk Creator
    • 15.3. Burn image
    • 15.4. View studies written on disk
  • Chapter 16. DICOM Viewer Settings
    • 16.1. General
    • 16.2. User interface
    • 16.3. DICOM
    • 16.4. Monitor
    • 16.5. Skins
    • 16.6. Modules
    • 16.7. Set Up Hotkeys Module
    • 16.8. Import and Export Settings
  • Chapter 17. DICOM Tag Viewing
    • 17.1. DICOM Tags. General Information
    • 17.2. DICOM Tag Viewer Window
    • 17.3. Anonymize studies and series
  • Chapter 18. Print Images
    • 18.1. Working with Print List
    • 18.2. Edit print list in Preview window
    • 18.3. Print Images on Film
    • 18.4. Print Images on Paper
    • 18.5. Printing Pages Export
  • Chapter 19. Licensing
    • 19.1. Trial period
    • 19.2. The First Launch and Licensing
    • 19.3. Purchase of a License
  • Chapter 20. Help System and User Assistance
    • 20.1. Help System
    • 20.2. Tooltips
  • ``Hotkeys''
    • Accepted Abbreviations
    • Key Combinations Used in All Windows
    • Key Combinations Used in Image View Window
    • Key Combinations Used in 3D Reconstruction Window
    • Key Combinations Used in DICOM Tag View Window
    • Key Combinations Used in Curvilinear Reconstruction Mode
    • Key Combinations Used in Multiplanar Reconstruction Window
    • Key Combinations Used in Virtual Endoscopy Window
 
Inobitec DICOM Viewer

Chapter 1. Program Window Elements

The main application window looks as follows (Fig. 1.1).


PIC

Figure 1.1: Main application window


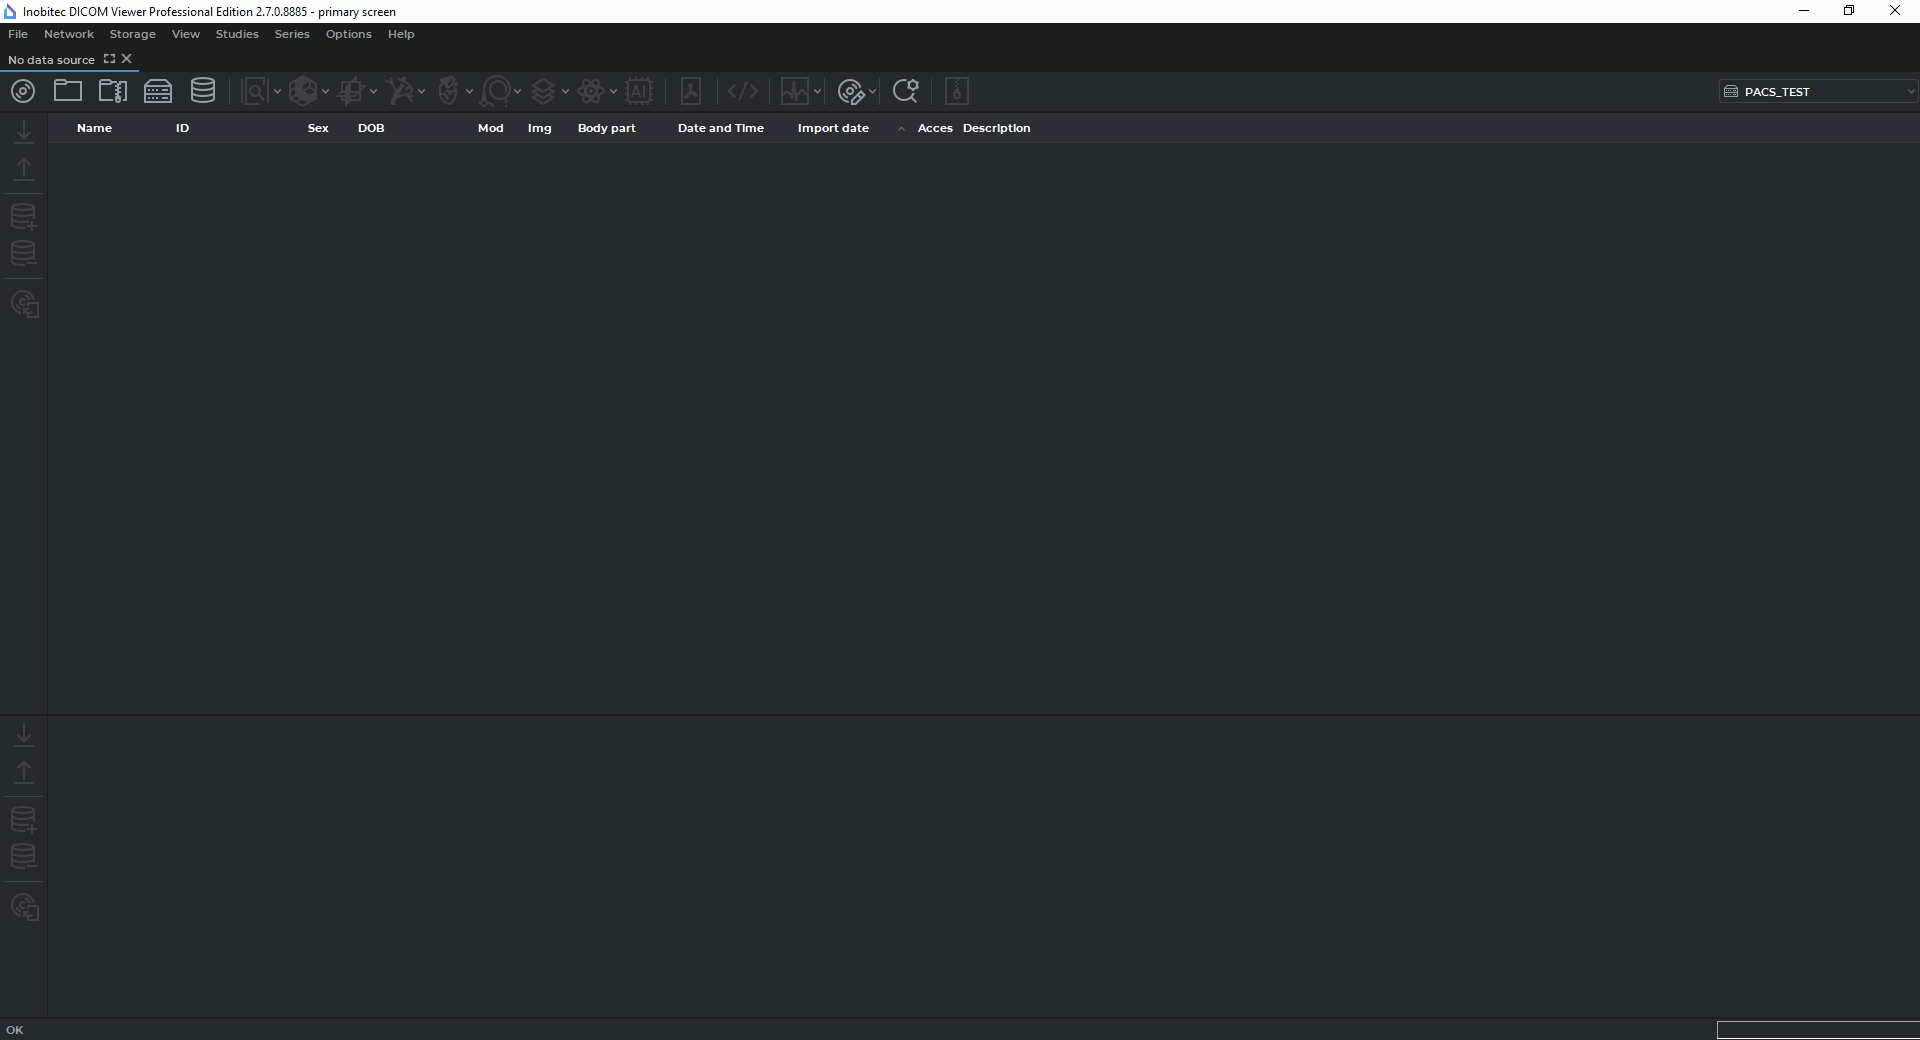
The DICOM Viewer window consists of several elements.

 1.1 Main Menu
  1.1.1 File
  1.1.2 Network
  1.1.3 Storage
  1.1.4 View
  1.1.5 Studies
  1.1.6 Series
  1.1.7 Options
  1.1.8 Help
 1.2 Window Management
 1.3 Tab Panel
  1.3.1 General
  1.3.2 Manage a Tab
 1.4 Toolbar
 1.5 Select Data Source
  1.5.1 Select a CD, DVD or Local Folder as the Data Source
  1.5.2 Opening Zipped DICOM Studies
  1.5.3 Opening DICOM studies by dragging and dropping
  1.5.4 Select a PACS Server or Local Storage as the Data Source
 1.6 Save Studies to the folder
 1.7 Search Panel
  1.7.1 Saving the Search Parameters
  1.7.2 Searching for Studies by Preset Parameters
 1.8 Select Server Panel
 1.9 Study Panel
  1.9.1 Customize Study Panel
  1.9.2 Sort Studies
  1.9.3 Edit Patient Name and Description in a Study
  1.9.4 Study List Export
 1.10 Series Panel
 1.11 Studies and Series Import/Export Panels
 1.12 Information Panel
 1.13 Uncompress series
 1.14 Tool Control Buttons

  • Company
  • services
  • products
  • downloads
  • support
  • distribution
  • buy
© 2023 INOBITEC LLC. All rights reserved.