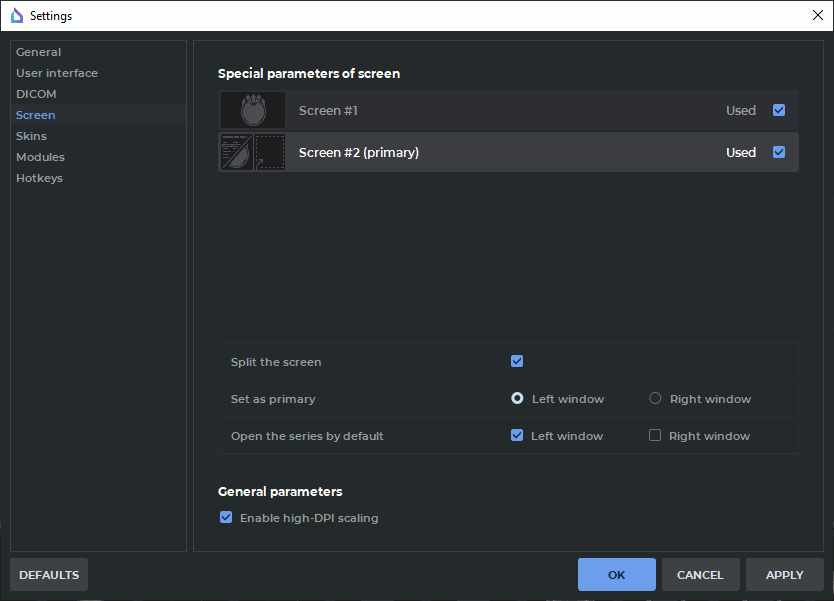
Figure 16.2: Monitor settings
This section is meant for customizing the DICOM Viewer windows display on the monitors available for the OS.
The DICOM Viewer provides an opportunity to display information on several monitors, and the user does not have to move the windows manually.
To use an additional monitor, proceed as follows:
Select the Options menu and the Settings... item.
Open the Screen section. The window similar to the one shown in Fig. 16.2 will pop up.
On the Special parameters of screen list, select the screen(s) to be used for the DICOM Viewer. The screen status will be changed to Used.
Click OK or APPLY to apply the changes or CANCEL to cancel the actions. To restore default settings, click the DEFAULTS button.
The DICOM Viewer needs to restart to apply the changes. The DICOM Viewer will request confirmation before restarting: The changes you are made requires restarting the program to take effect. Do you want to restart the application?.
If you are still working with the opened studies, or if the information needs to be saved, click NO to cancel the restart and set up the displays later. To restart the DICOM Viewer click YES.
If only one screen is selected, the DICOM Viewer will be opened on this screen. If more than one screens are checked, the DICOM Viewer windows are opened on the marked screens. To close the DICOM Viewer just close any of the windows.
The DICOM Viewer provides an opportunity to divide the screen into two parts and place two windows side by side at launch.
To change special parameters of the screen, proceed as follows:
Select the Options menu and the Settings... item.
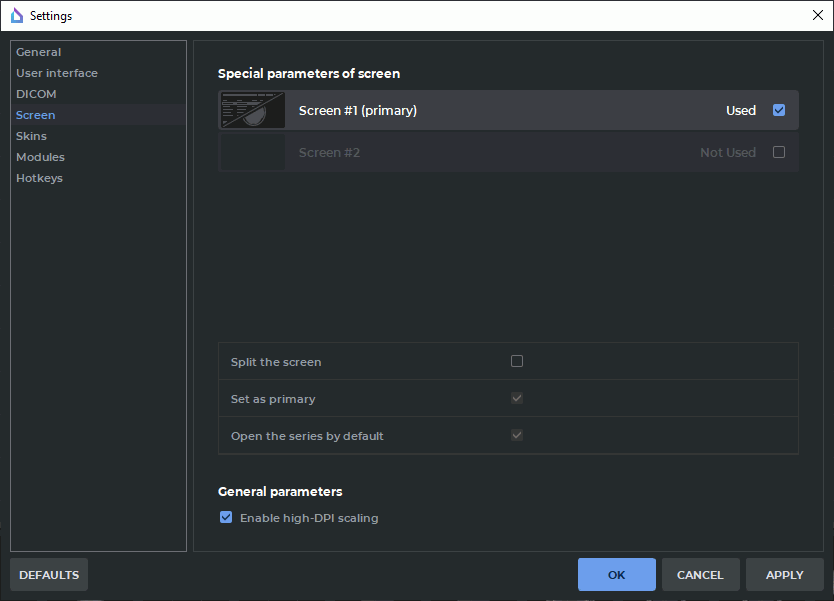
Open the Screen section. The window similar to the one shown in Fig. 16.2 will pop up.
Select the screen you want to split in the Special parameters of screen list. A Not used screen cannot be selected.
Check the Split the screen for the selected screen (see Fig. 16.3).
Select the left or the right window as the primary by choosing the respective option in the Set as primary line. When the DICOM Viewer launched, the tab with the study list appears automatically in the primary window. Only one window may be selected as the primary. In other windows, the tab with the study list may be opened manually from the main menu File->Study list.
In the Open the series by default line, check the boxes for the windows in which you want to open series in the respective tabs (Image viewer, Volume reconstruction, MPR reconstruction etc.) by double-clicking on the thumbnail or by pressing the respective button on the toolbar. The order of opening series in the windows for which the Open the series by default box has been checked is determined by the arrangement of the windows (left-to-right or top-down).
Click OK or APPLY to apply the changes or CANCEL to cancel the actions. To restore default settings, click the DEFAULTS button.
In the restart confirmation window, click YES to restart or NO to cancel restart and continue working.
When the user chooses the Show as detached window series arrangement (see Section 1.4), the
window is opened in the center of the screen. To fix a detached window, click the Fix window  button in the window header. The window will be added as a tab to the left window of the respective
screen.
button in the window header. The window will be added as a tab to the left window of the respective
screen.
When the user chooses the Show fullscreen series arrangement (see Section 1.4), the window is expanded to full screen. Open series windows may overlap. When the user exits full screen mode, the series window is added as a tab to the respective program window.
To automatically scale the interface for high-resolution monitors according to the scale of the operating system, check the Enable High-DPI scaling box. The change will take effect the next time you launch DICOM Viewer.
To enable multi-touch gestures support on a touchscreen monitor, check the Enable multi-touch gestures box. If the box is unchecked, only single-touch gestures are supported. By default, this box is checked for Windows and unchecked for other operating systems. For details on the touch gestures supported, see Section 1.15.
To apply the settings, close the program and launch it again.