| Attention! This function is only available for users with extended rights. |
____________________________________________________________________________________________
Functionality is available in a separate module which is activated in the Pro edition for an extra fee
____________________________________________________________________________________________
A tree of groups and classes is a hierarchical list of items. The items of the superior level are object groups and/or classes. The classes of objects that do not belong to any group are shown at the top of the list.
____________________________________________________________________________________________
Functionality is available in a separate module which is activated in the Pro edition for an extra fee
____________________________________________________________________________________________
| | Attention! This function is only available for users with extended rights. |
There are two ways to add a new object class:
click the Add class  button on the image annotation panel;
through the context menu: right-click on the annotation panel and select the Add class... option.
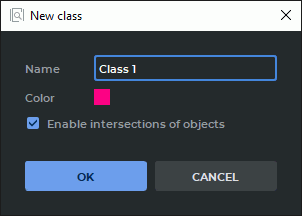
In the New class dialog box (Fig. 12.3)), print the name of the object class. By default, an object class is assigned a name in Class <unique number> format.
In order to avoid intersection of object contours, uncheck the Enable intersections of objects box. The box is checked by default. Customize the color of the contours for this class of object by pressing the color icon and selecting a suitable color in the respective dialog box.
Click OK to create a new object class or CANCEL to cancel.
If a group is selected when the user presses the Add class button, the new object class will be added to the selected group. If a class is selected, the new object class will be added to the group to which the selected class belongs. If the selected class does not belong to any group, the new object class will be added to the superior level of the tree.
____________________________________________________________________________________________
Functionality is available in a separate module which is activated in the Pro edition for an extra fee
____________________________________________________________________________________________
| | Attention! This function is only available for users with extended rights. |
There are two ways to add a new group:
click the Add group  button on the image annotation panel;
through the context menu: right-click on the annotation panel and select the Add group... option.
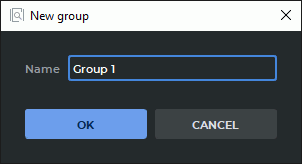
In the New group dialog box (Fig. 12.4), print the name of the group. By default, a group is assigned a name in Group <unique number> format.
Click OK to create a new group or CANCEL to cancel.
If one or several classes are selected on the list when the user presses the Add group button, these classes are automatically transferred to the new group. Otherwise, a new empty group will be added.
____________________________________________________________________________________________
Functionality is available in a separate module which is activated in the Pro edition for an extra fee
____________________________________________________________________________________________
| | Attention! This function is only available for users with extended rights. |
 | If the current tree of object classes and groups is changed, it may result in incompatibility with the trees that were created earlier (see Section 12.3.4). |
The following actions may be performed with groups and classes:
moving. To change the structure of a tree of groups and classes, mouse over a group or class and drag the selected group or class to another place on the tree while holding the left mouse button;
renaming. Double-click on the name of a group or class, type the new name and press Enter on the keyboard;
editing class parameters. Click the Settings  button for the selected object class
and change the parameters in the Class settings dialog box. The interface of the Class
settings dialog box is identical with the interface of the dialog box for creating a new
class (see Fig. 12.3);
button for the selected object class
and change the parameters in the Class settings dialog box. The interface of the Class
settings dialog box is identical with the interface of the dialog box for creating a new
class (see Fig. 12.3);
deleting. Select a group or class. Click the right mouse button and select the Remove
group/class option from the context menu or click the Remove group/class  button on the image annotation panel.
When the user terminates work with the program, the current state of the tree of groups and classes is saved in a JSON file if it contains at least one group and/or class. Otherwise, the JSON file will be deleted. The file named ia_classes.json is placed in the <Path to the storage>/ImageAnnotation directory where the <Path to the storage> is the path specified in the Workspace section of the general settings window (see Section 16.1).
When the program is launched, the current tree of groups and classes is automatically opened from the Specified JSON file. If such a file does not exist, an empty image annotation panel will pop up when the program is launched.
____________________________________________________________________________________________
Functionality is available in a separate module which is activated in the Pro edition for an extra fee
____________________________________________________________________________________________
Each tree of groups and classes is assigned a unique identifier (uid) and a number of the version which is changed when the structure of the tree is altered.
If the user, after importing/exporting the classes and groups tree, saving results or exporting results with DICOM data, performs one of the following actions with the tree of groups and classes:
adds a new class;
changes the parent group for the class (by dragging);
adds a new group;
deletes a group;
changes the name of a group,
then the version of the tree of groups and classes will be changed (increased by 1). The unique identifier (uid) of the tree will stay the same.
If the user, after importing/exporting the classes and groups tree, saving results or exporting results with DICOM data, performs one of the following actions with the tree of groups and classes:
deletes a class;
changes the name of a class;
changes the color of objects for a class;
changes the intersection option for objects belonging to a certain class,
then a new uid will be generated for the tree of groups and classes, and the tree version will be reset to 1.
Trees with the same uid are compatible and may be upgraded (see Section 12.4.2). Trees with different uids are incompatible, but one tree may be replaced by another (see Section 12.6.2).
The uid value and the tree version number are saved in a JSON file when the tree is exported, or when the annotation results are exported or saved.